How to Sign-In to Source-Nexus Gateway
Welcome! This page will guide you through the steps to connect for our remote session using Source Elements’ Source-Nexus Gateway.
I’ve been using Source Elements products for years and find their audio streaming provides the highest quality with minimal dropouts and glitches. While the product names might be a mouthful at first, I assure you that once you try Source-Nexus Gateway, you’ll be impressed.
Now, let’s get you set up for our session together!
Step 1: Sign in to Source-Nexus
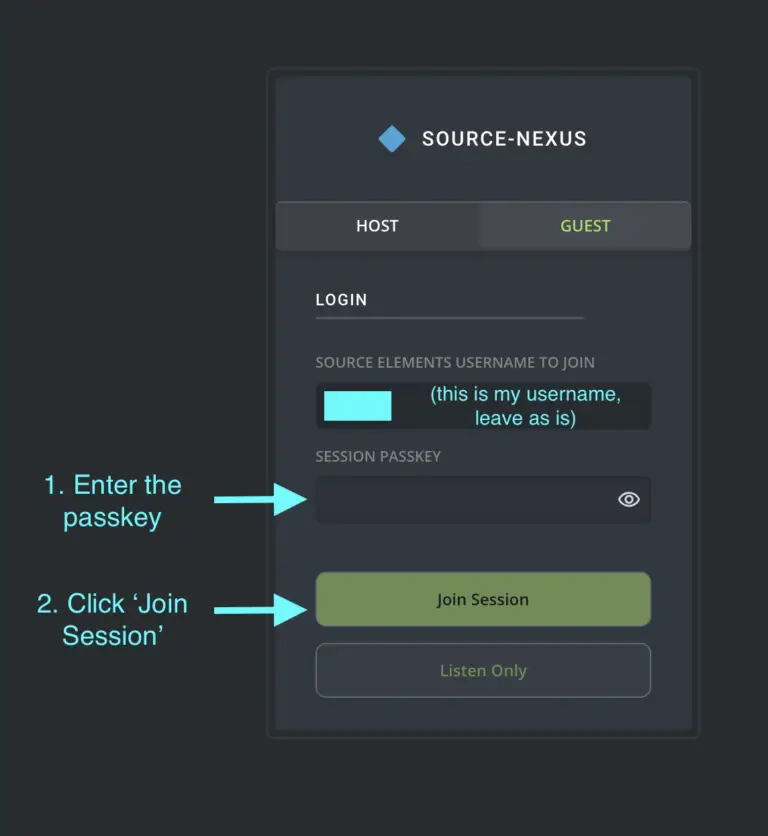
Enter the passkey to access our session
- Make sure the “Guest” tab is highlighted green (it should be, by default)
- Disregard the username field, which is pre-filled with my user information.
- Enter the session passkey I emailed to you. Please reach out to me via email or text if you don’t have your passkey.
Step 2: Browser Permissions
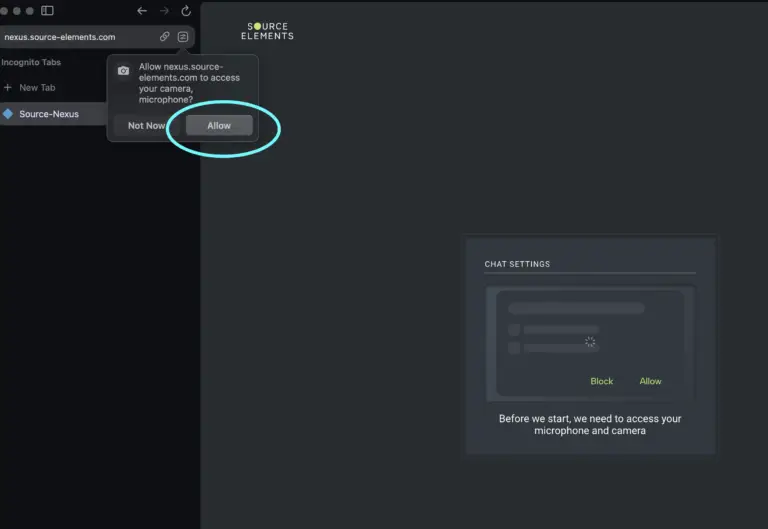
Give Source-Nexus permission to access your camera and microphone
- When prompted, click “Allow.”
- If this window does not appear, or if you need to adjust your browser permissions manually, refer to your browser’s privacy controls. This can usually be accessed via an icon in the URL address bar.
Step 3: Basic Chat Settings
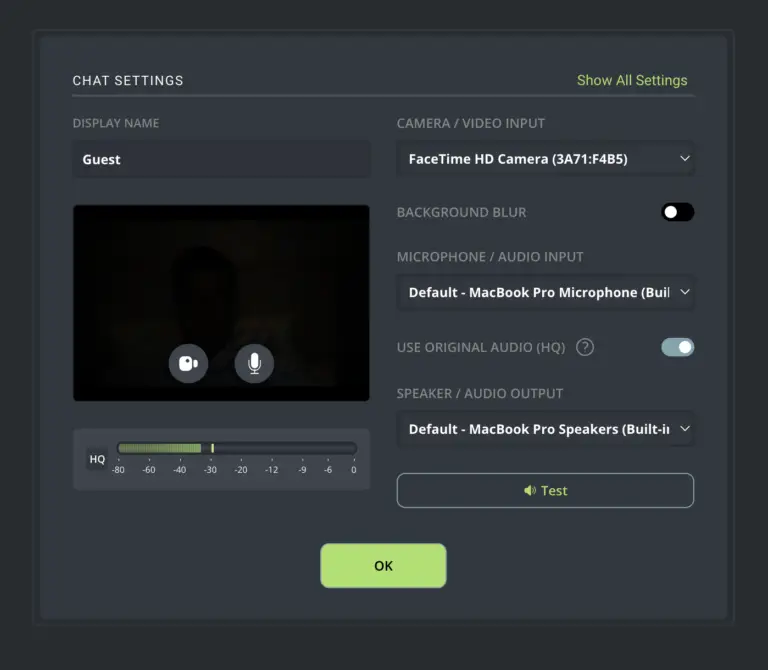
Specify your name and A/V equipment details
- Update your Display Name to something truthful, or at least more clever than “Guest.”
- Select your camera, microphone, and audio output device from the drop-down menus.
- If you will be streaming audio to me for recording purposes please toggle ON “Use Original Audio (HQ).” If your microphone will only be used for communication purposes, feel free to leave this set to OFF.
- Click the “Test” button to ensure you are hearing the audio test tone.
- Important: before clicking “OK” please click “Show All Settings” in the top right corner to access more advanced Chat Settings.
Step 4: Advanced Chat Settings
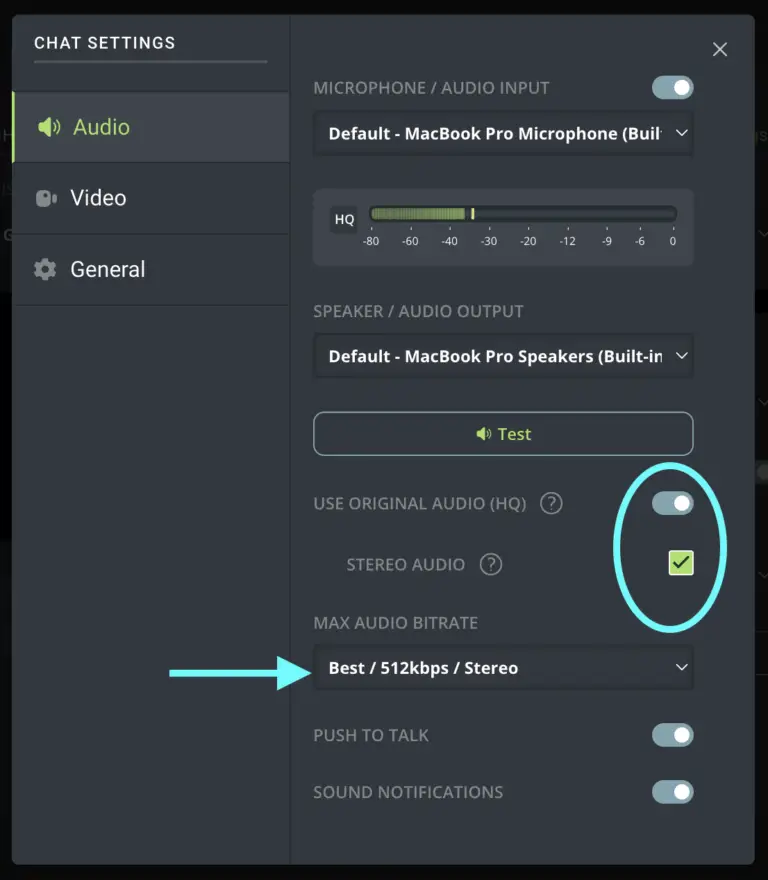
Give Source-Nexus an audio upgrade
- Be sure to check the box for “Stereo Audio”
- Change the “Max Audio Bitrate” drop-down menu to “Best / 512kbps / Stereo.” Assuming your internet connection is good, this setting provides the highest quality audio stream.
- If you experience audio buffering, drop-outs or other poor performance, select a lower Max Audio Bitrate from this menu at any time during our session.
- Enable the “Push To Talk” switch to use your keyboard’s spacebar as a talkback button. This is essential if you are listening on speakers, and also helps eliminate unwanted background noise if you are listening in a loud environment.
Step 5: Navigating the Session
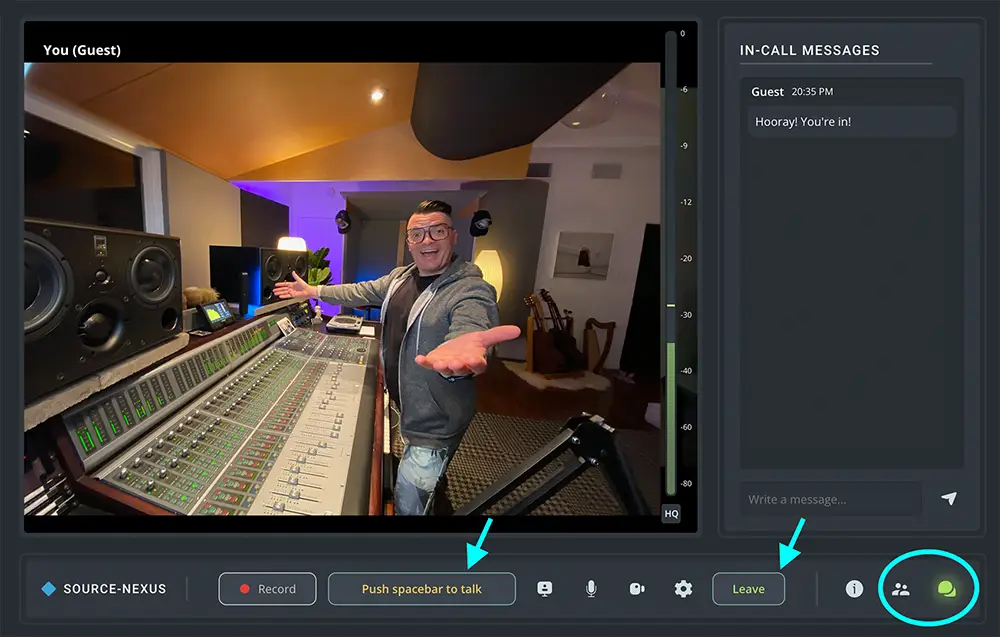
You're in! Let me show you around the interface
- Push your keyboard’s spacebar to talk (momentary talkback), or click the corresponding button below the video feed to keep your talkback open continuously (latched talkback).
- Open the user list or Messages side-panel by clicking on the icons on the bottom-right of window.
- Locate the icons along the bottom of the window to access and adjust audio and video settings at any time during our session.
- When our time together has ended, click the “Leave” button to exit the session.

